Deploy a Spring Boot app using AWS Beanstalk
Introduction
AWS is one of the most important cloud providers in the industry, with Azure and Google Cloud. In this blog post, I will explain how to deploy as Spring Boot application to AWS, using AWS Beanstalk.
First, I will describe the application, what technologies it uses, in order to understand what services we will need from AWS. Then, I will describe some AWS services that we need, and the deployment process.
The application
The application is available on Github. It allows users to sign up and log in. The users are persisted in a PostgreSQL database. More detailed about the application, including build steps and functionality, can be found on Github.
In order to run this application, we need a server where to run the application (where the jar file will be executed), and a database server. AWS offers these products, and many other products.
AWS products
Currently, AWS offers about 227 products, and the list of products offered by AWS is growing continuously. To deploy our application, we will need the following products:
Amazon Elastic Compute Cloud (EC2) will provide compute capacity, meaning the computer where the jar file will be executed. Amazon Relational Database Service (RDS) will provide the database that will host the data.
These services are enough for us to run the application. We can start provisioning EC2 instances, RDS instances, etc.
AWS Beanstalk
AWS Elastic Beanstalk is a service that we can use to automate EC2 and RDS provisioning, load balancing, automatic scaling. We will just upload the executable jar file, and Beanstalk will do the rest for us after some configuration.
Deploying the app
The demo application to be deployed can be found on Github. It’s a Spring Boot application, so after the build we will get a jar file that will be uploaded.
To deploy the application, you will need an AWS account. For the first 12 months after the account was created, some services are free in the limits of AWS Free Tier.
After the account was created, log in to AWS. Then, choose the Elastic Beanstalk product. Click on ‘Create new application’, and you will ee a screen similar to the one below.
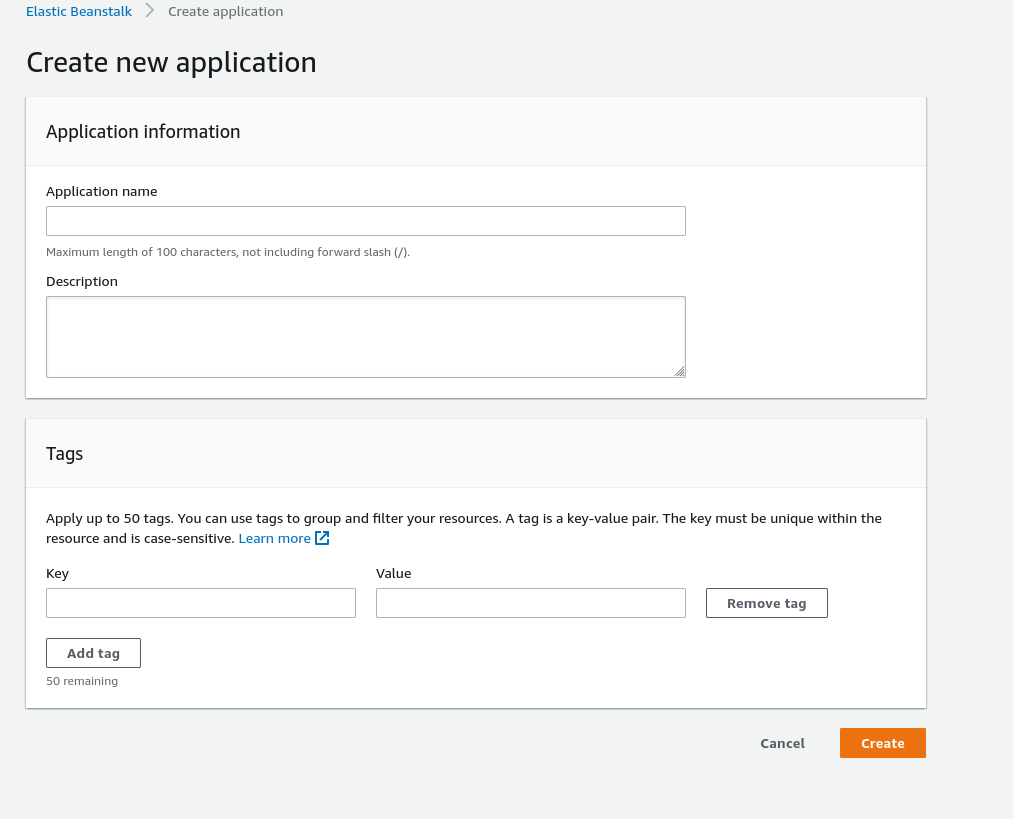
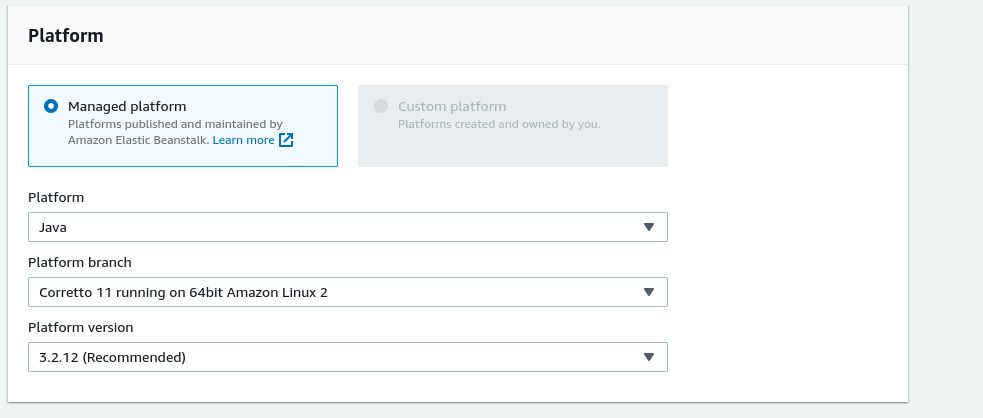
Choose a name, then click ‘Create’. Next the environment will be configured. Select the Java platform.
Next, upload the jar file obtained after building the sample app.
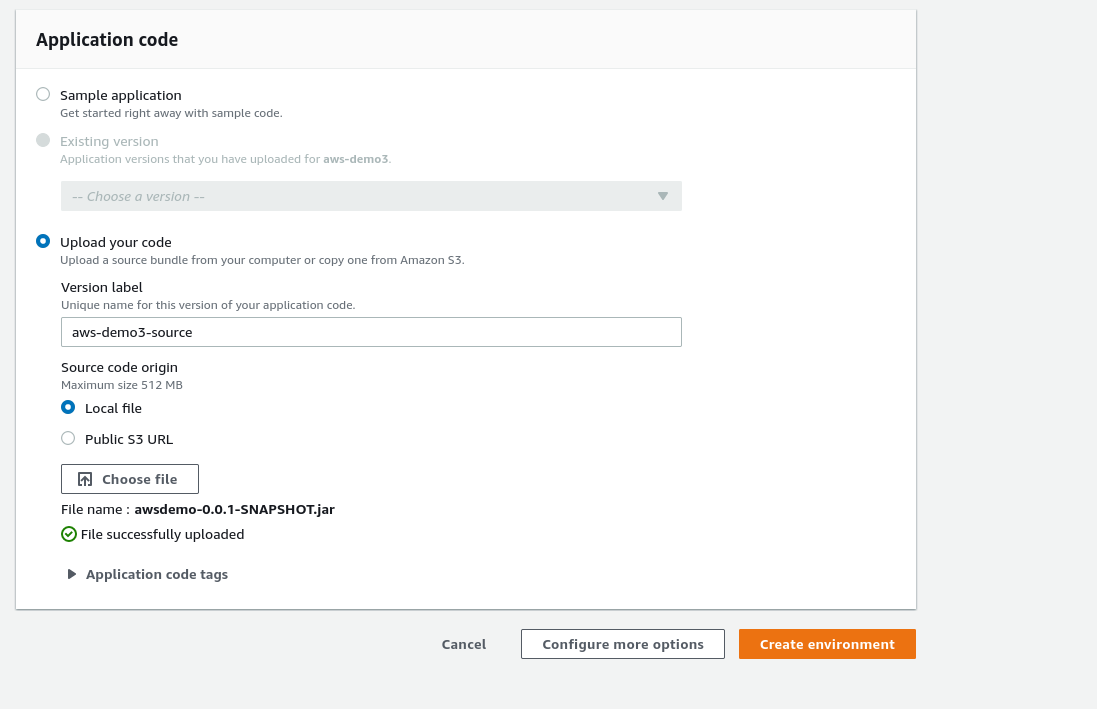
Next, click on ‘Configure more options’. Database will be configured next. Click the ‘Edit’ button near the database section.

Configure the database. Select db.t3.small as instance class, choose a username, and a password (you will need these later, the Spring Boot app will need these credentials, so note them down).
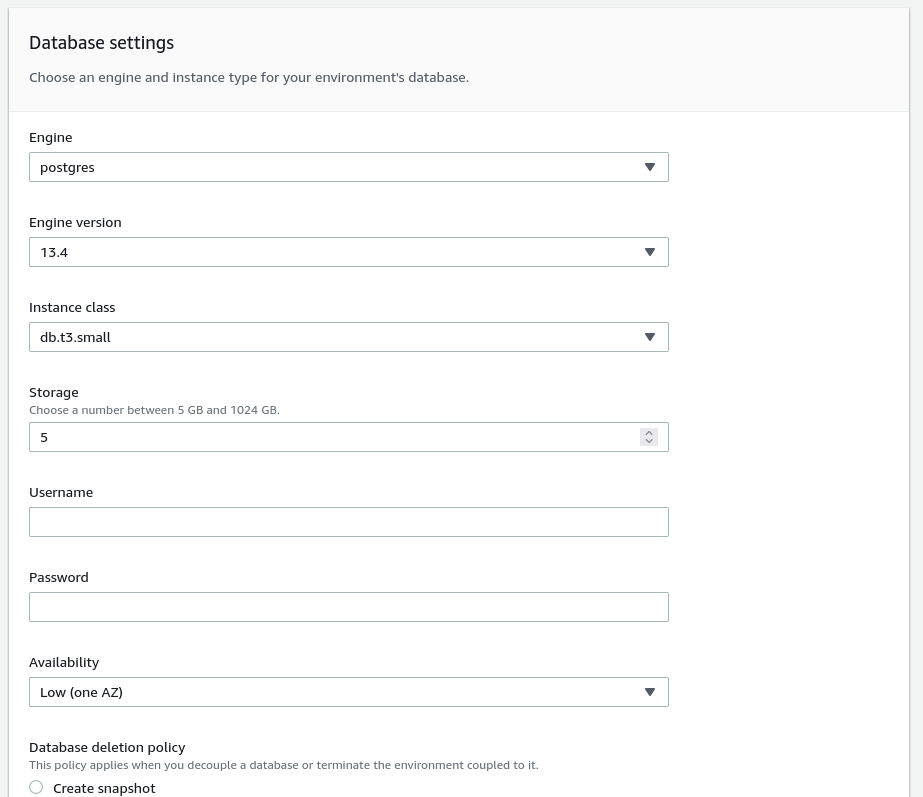
Here, you can choose the Database retention policy as well. I want the database to be deleted after the application is deleted, so I will choose ‘Delete’.
Next, just create the environment. It will take some moments until the environment will be created.

The environment is not healthy yet. This is because the app needs to run on port 5000 (by default Spring Boot app run on port 808), and because we need to provide DB URL, username and password to the application.
First, let’s configure the database.

Click on ‘Edit’ (the database). Click on the Database endpoint.
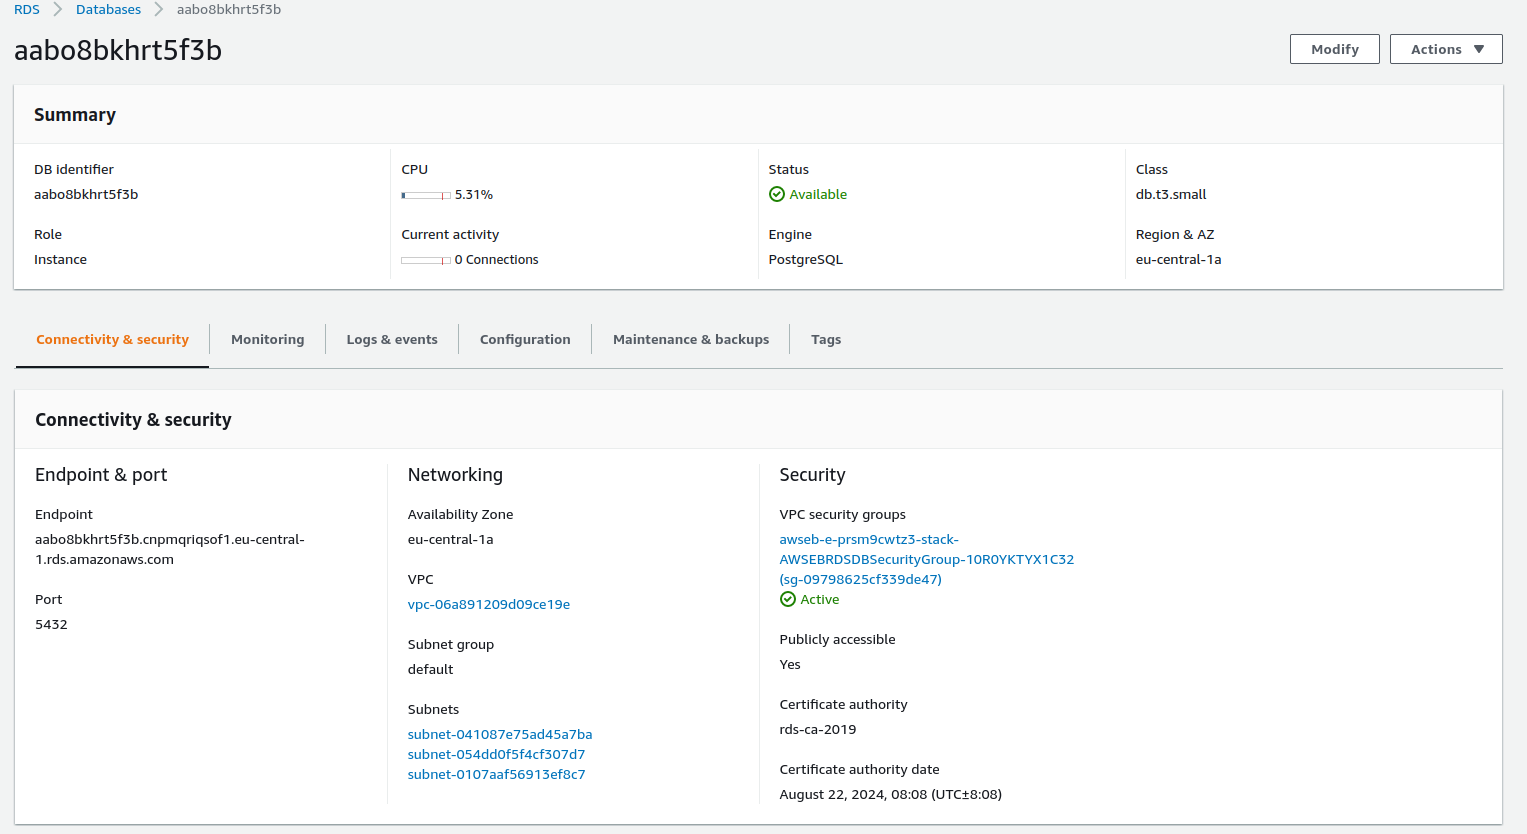
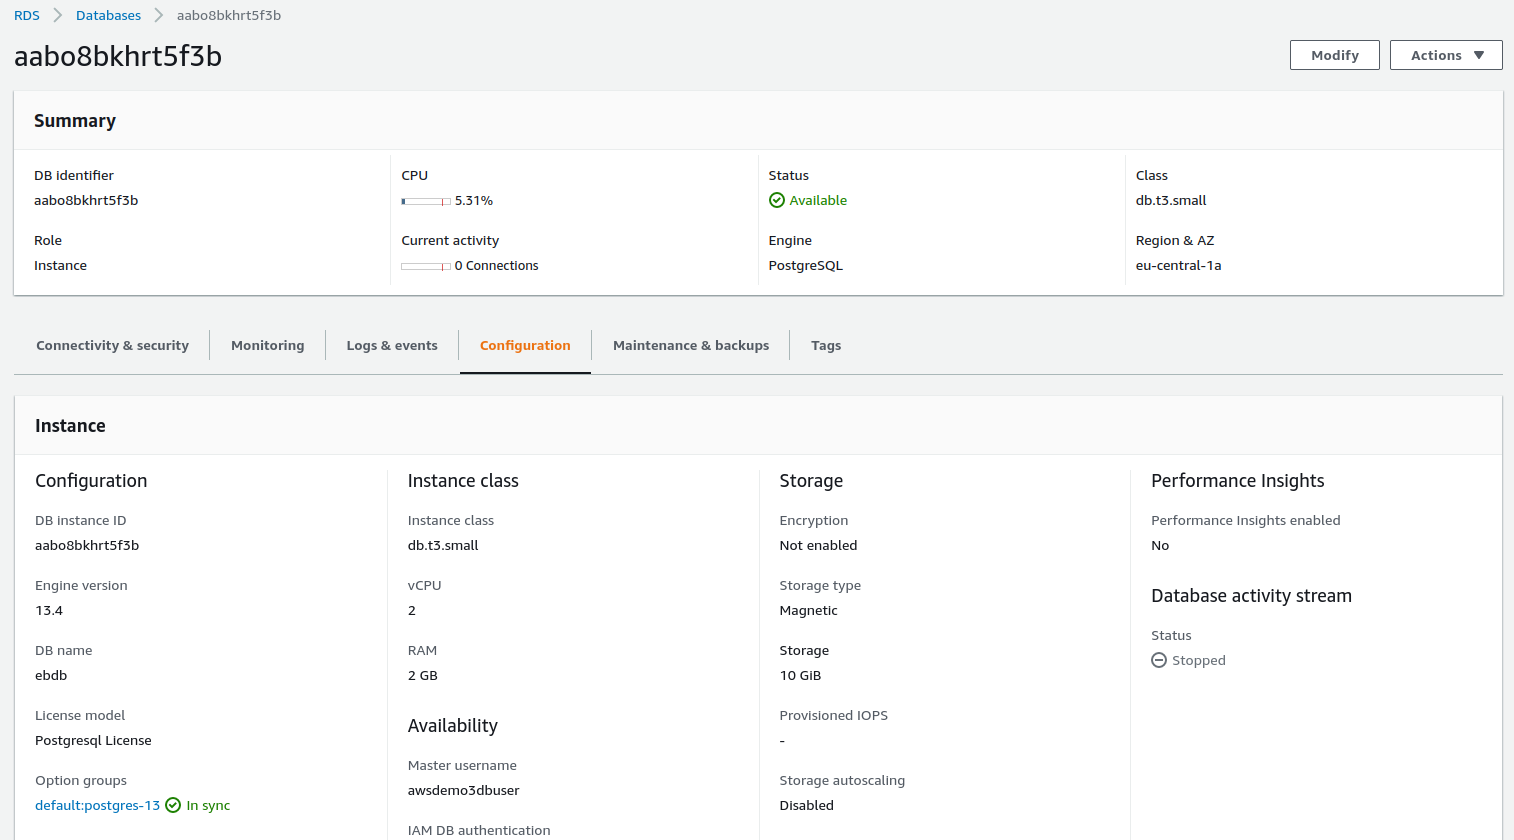
Here, there are 2 tabs to need to look at, in order to create the database URL: Connectivity and Security, Configuration.
In our example, the database URL is jdbc:postgresql://aabo8bkhrt5f3b.cnpmqriqsof1.eu-central-1.rds.amazonaws.com:5432/ebdb
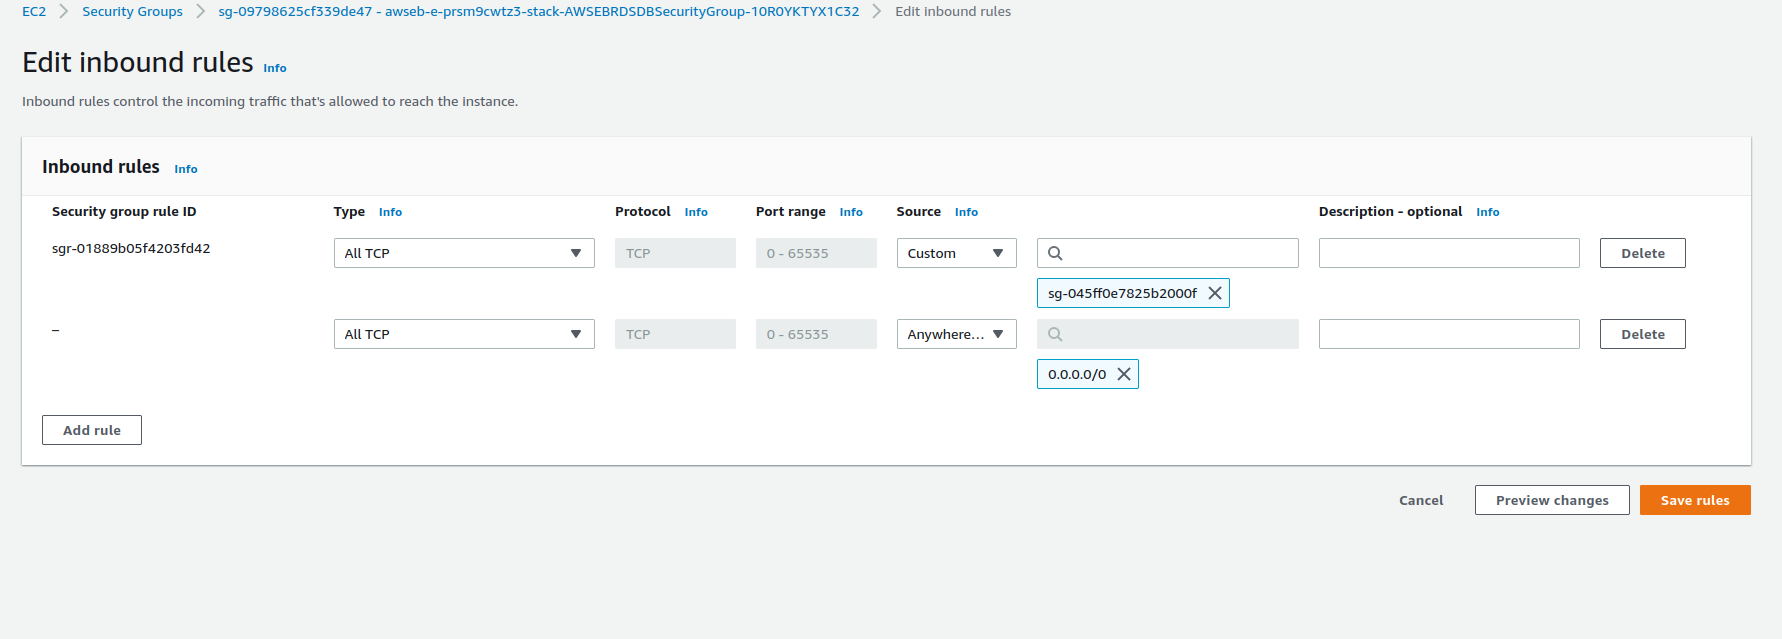
Next, you can use an SQL client to connect, from the local machine, to this DB. In case you encounter timeouts, you need to edit the security group. A security group is a firewall. Add a new rule, to allow inbound traffic from anywhere (NOT RECOMMENDED FOR PRODUCTION).
 .
.
You should be able to connect locally to the DB now. Now, execute the create_db.sql instructions from the demo app.
The next thing to do is to edit the application ENV variables, to pass the
DB url and credentials.
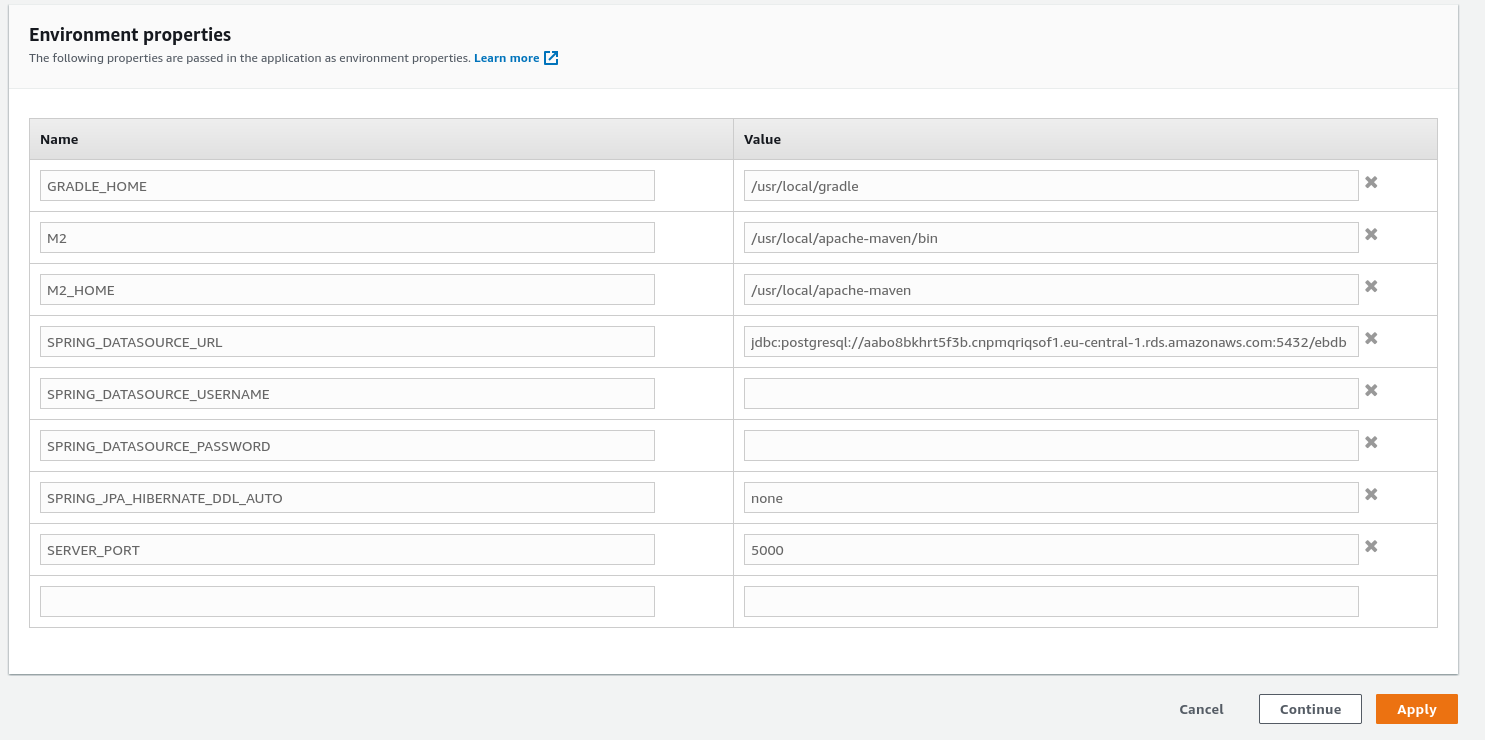
On the Configuration page, edit the Software for adding ENV variables. Add the following:
export SERVER_PORT=5000
export SPRING_DATASOURCE_URL=<your DB URL>
export SPRING_DATASOURCE_USERNAME=<your username>
export SPRING_DATASOURCE_PASSWORD=<the password that you configured>
export SPRING_JPA_HIBERNATE_DDL_AUTO=none
 .
.
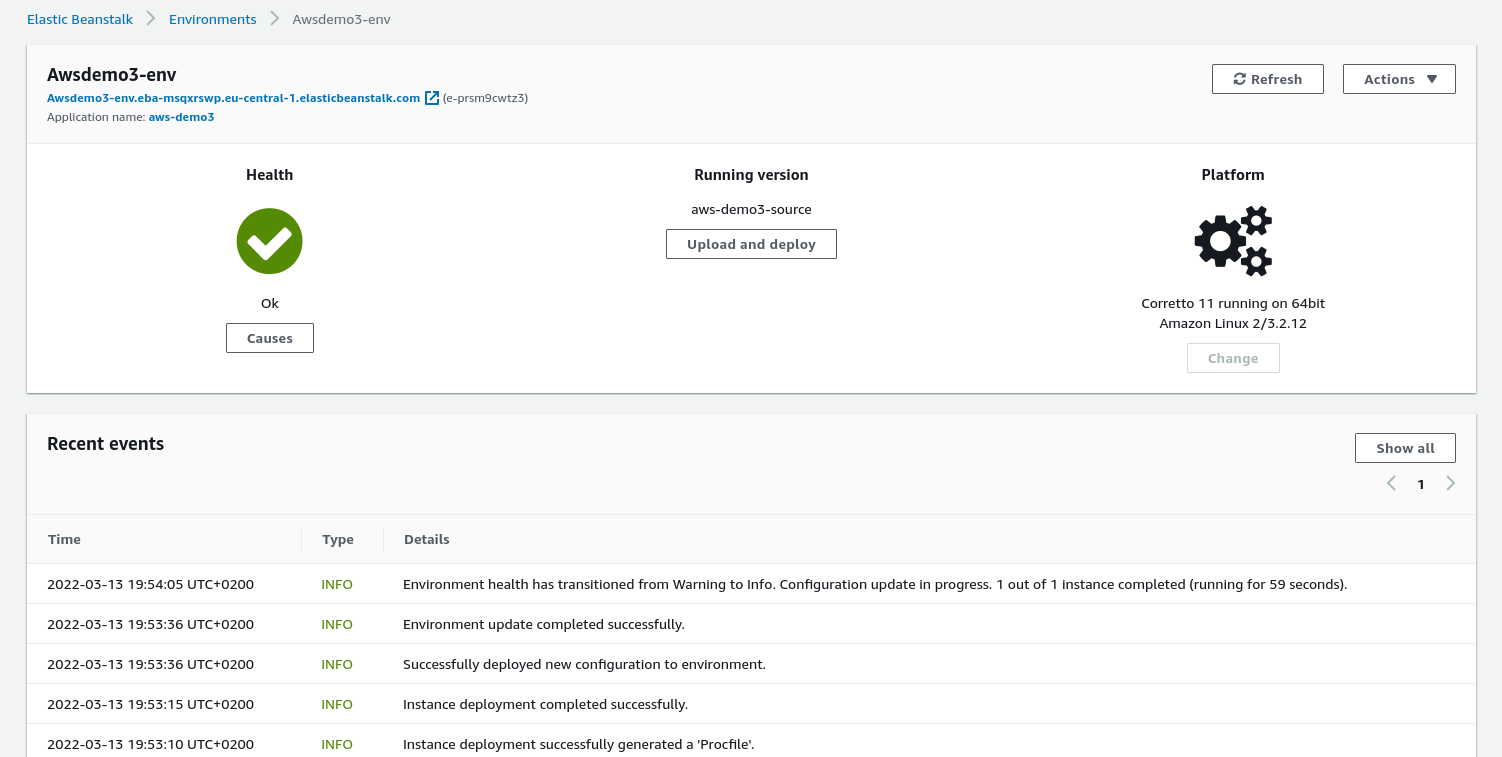
After a while, the application should be deployed.
 .
.
The URL (http://awsdemo3-env.eba-msqxrswp.eu-central-1.elasticbeanstalk.com/ in this example) works. You can now test the app, according to the Github page instructions.
Capacity
Something interesting to mention is the ‘Capacity’ section of the Configuration. Here, you can configure an Auto Scaling group. You can select Environment type to ‘Load balancer’, and you can configure a minimum and maximum of EC2 instances. For example, if the app receives many requests, AWS will scale in, creating more EC2 instances; if the number of requests decreases, AWS will shut down EC2 instances.
Clean up
Don’t forget to delete the app that was deployed, since it’s consuming AWS resources. Or, if you want to keep it for a while, at least edit the security group, removing the rule that allows everyone to connect to the DB.
References
https://aws.amazon.com/blogs/devops/deploying-a-spring-boot-application-on-aws-using-aws-elastic-beanstalk/
https://aws.amazon.com/blogs/opensource/getting-started-with-spring-boot-on-aws-part-1/